
AI Cartoon Generator: Create Stunning Comic Strips from Photos
Have you ever looked at a photo and thought it belonged in a graphic novel? Perhaps you have a funny story to tell about your pet. Maybe you want to immortalize a memory with friends in a unique way. For years, creating a comic strip required professional drawing skills or expensive software. But today, the world of visual storytelling has changed forever. How can you create a stunning comic strip without picking up a pencil?
The answer lies in the power of artificial intelligence. Modern photo to comic book generators make it easy to transform everyday snapshots into professional-grade illustrations. Whether you are a social media influencer looking for fresh content or a hobbyist exploring new creative outlets, an AI cartoon generator makes the process fast and accessible.
This guide will walk you through building your own comic from scratch. Following these steps will ensure your final product looks like it came straight from a professional studio. Let’s dive into the world of sequential art and learn how to bring your stories to life.
Planning Your Comic Strip with AI Cartoon Generator
Before you start generating images, you need a plan. A comic strip is more than just a series of pretty pictures. It is a narrative. Without a clear structure, your readers might get lost or lose interest. Using technology effectively starts with a solid foundation.
Developing Your Narrative Concept
Every great comic begins with a concept. You do not need a 300-page script to get started. In fact, many popular digital comics are only three or four panels long. Start by identifying the "hook" of your story. Are you telling a joke? Are you sharing a "day in the life" moment?
A simple way to structure your narrative is the "Three-Act" approach:
- The Setup: Introduce the character and the situation.
- The Conflict: Something happens—a problem arises or a question is asked.
- The Resolution: The punchline or the conclusion of the event.
By keeping your concept simple, you make it easier to choose which photos to use. Once you have your story idea, write down what happens in each panel. This acts as your roadmap when you begin to transform photos into cartoon art.
Selecting Consistent Characters and Scenes
One of the biggest challenges in AI storytelling is consistency. If your main character looks like a 3D Pixar character in panel one but a hand-drawn sketch in panel two, the reader will be confused. To avoid this, select photos that share similar lighting and angles.
When choosing photos for your comic, look for:
- Clear Expressions: Comics rely heavily on emotion. Choose photos where facial expressions are prominent.
- Simple Backgrounds: Simple backgrounds make it easier to focus on the characters.
- Varied Angles: Use a mix of close-ups and wide shots to keep the comic dynamic.
By planning your scenes ahead of time, you ensure that our AI cartoon generator has the best possible "raw material" to work with. Consistency is the key to making your AI-generated comic feel like a professional work of art.
Creating Characters with Our AI Cartoon Generator
Now comes the exciting part: seeing your photos turn into art. Using a dedicated tool allows you to apply professional artistic styles to your images instantly. This is where your narrative begins to take on a visual identity.
Uploading and Processing Multiple Images
The process of turning your photos into comic panels is straightforward. First, head over to the online cartoon generator and prepare your first set of images. Most creators prefer to process their photos one by one. This ensures each image meets their quality standards.
Here is a quick breakdown of the steps:
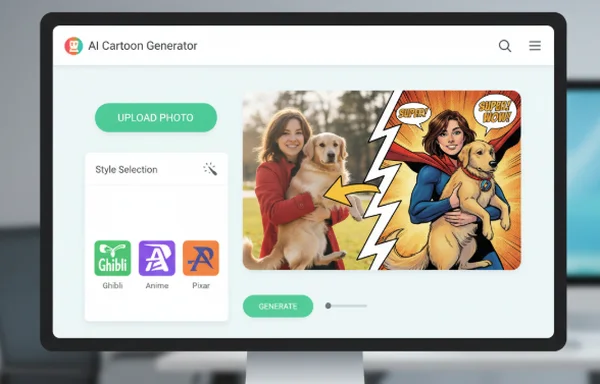
- Upload: Click the upload button and select a high-quality JPG or PNG of your subject.
- Style Selection: This defines the "look" of your comic. You can choose from styles like Ghibli, Anime, or Pixar. For a classic comic book feel, "Sketch" or "Disney" styles often work best.
- Configure: Choose the aspect ratio that fits your layout. A 1:1 square is great for Instagram, while a 2:3 ratio works well for vertical panels.
- Generate: Let the AI work its magic. Within seconds, your photo is transformed.
By using a free tool, you can experiment with different styles. Try several options until you find the one that matches the tone of your story.
Maintaining Visual Consistency Across Characters
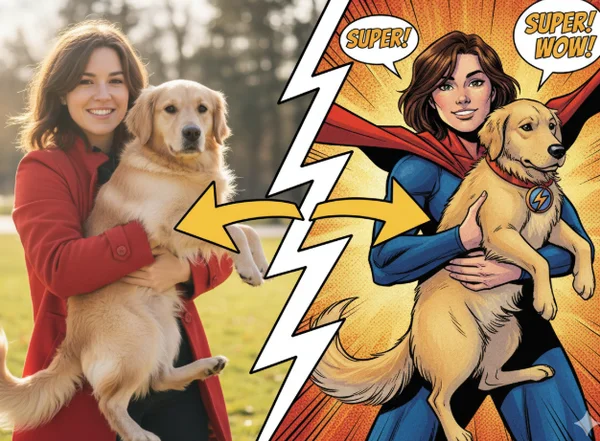
To make your comic look professional, you must maintain style consistency across all panels. Consistency is key in comic creation. If you chose the 'Ghibli' style for your first panel, use that same style for all subsequent images. This creates a 'visual language' that tells readers these images belong to the same world.
The AI algorithms are designed to apply styles uniformly. However, you can help the AI by ensuring your original photos have similar quality. Avoid mixing low-resolution selfies with high-resolution professional photography. The more consistent your input, the more consistent your output will be. This is a vital step when you want to create characters that feel alive and recurring throughout your series.
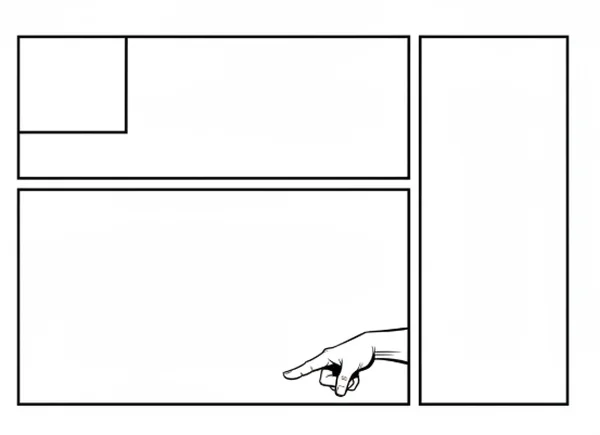
Arranging Your Comic Strip Layout
Once you have your generated cartoon images, it is time to assemble them. This stage is known as "paneling." How you arrange your images dictates how the reader experiences the story's timing and pace.
Basic Comic Strip Composition Techniques
The layout of your comic strip is just as important as the art itself. In Western cultures, people read from left to right and top to bottom. Your panels should follow this natural flow.
Consider these composition tips:
- Size Matters: Make your most important panel the largest. If the resolution of your story is a big explosion or a funny face, give it more space.
- The Gutters: The white space between panels is called the "gutter." Keep your gutters consistent in width to give the comic a clean, organized look.
- Overlapping: For a more dynamic feel, you can have a character's arm slightly overlap the edge of the panel. This creates a sense of depth.
Using sequential art with AI means you don't have to worry about the drawing. You can spend more time perfecting these layout details. You can use simple graphic design tools to drag and drop your AI generated images into a grid.
Adding Text and Speech Bubbles
A comic isn't a comic without dialogue. Speech bubbles are the bridge between the art and the story. When adding text, keep it concise. Space is limited in a comic panel. You do not want the words to cover up the cartoon art you just generated.
Tips for great dialogue:
- Tail Direction: Ensure the "tail" of the speech bubble points clearly toward the character's mouth.
- Font Choice: Use a "Comic" style font that is easy to read. Avoid overly decorative fonts that might strain the reader's eyes.
- Sound Effects: Add "POW," "BAM," or "ZAP" in bold, colorful text to add energy to your scenes.
Once your text is in place, your comic is complete! You have successfully used an AI tool to bridge the gap between a simple photo and professional sequential art.
Bringing Your Vision to Life
Creating your own comic strip is no longer a dream reserved for those with art school training. By combining your unique storytelling ideas with a powerful AI tool, you can produce high-quality, engaging content in minutes. We have explored how to plan your narrative, generate consistent characters, and layout your panels for maximum impact.
Ready to bring your ideas to life? Don't wait for perfection—just begin creating. Our AI cartoon generator lets you experiment freely, trying different styles and approaches until you discover what works best for your unique vision.
Whether you want to become a webcomic creator or just want to make your friends laugh, the tools are at your fingertips. Visit CartoonGenerator.ai today, upload your first photo, and start your journey into the world of AI-powered comic creation!
The Takeaway
What types of photos work best for creating comic strip characters?
For the best results, use photos with clear lighting and high resolution. Portraits or mid-body shots where the face is clearly visible work best. Avoid photos that are very blurry or dark. The AI needs to "see" features clearly to apply styles accurately. You can test your photos to see which ones produce the most vibrant results.
How can I ensure consistent art style across all my comic panels?
Consistency is achieved by using the same style setting for every photo. If you start your comic using the "Pixar" style, select that exact same option for every panel. Additionally, use photos taken in similar environments or with similar lighting. This helps the AI maintain a uniform look across your entire story.
Can I create multi-page comic stories with this method?
Absolutely! While many users start with single-strip comics, you can create full-length graphic novels. The key is organization. Keep a folder for each "scene" and save your generated images with clear names. By processing your characters through the AI generator systematically, you can build an extensive library of assets for a much larger storytelling project.